Step-by-step guide to integrating with Remark42 comment engine
This post contains a step-by-step guide on adding comments to a website using the Remark42 comment engine. Keep reading to see my reasoning behind for choosing Remark42, or skip directly to Part 1 of the guide.
Why I chose Remark42 as my comment engine
Remark42 advantages:
- Straightforward comment UI
- No ads
- Respects user privacy; doesn't collect sell unnecessary user data
- Supports many types of user login, including non-logged-in (anonymous), email, Google, Github, Facebook, and more
- Is an actively maintained project; has many stars and recent commits on Github
- Is free* (*This guide uses a free implementation, though the setup could involve payment depending on how self-hosting is implemented. I wanted to start with a free implementation because I'm not sure if I want to keep this implementation long-term.)
Remark42 disadvantages:
- Requires additional setup for hosting (However, this may be a good exercise for a web developer)
- Lacks spam detection. However, there's an option to disable anonymous comments, which should reduce spam.
- Lacks UI customization options
There are a few other comment systems that I considered:
- Isso. This is a self-hosted comment system that appears to have very similar features to Remark42. I tossed a coin and went with Remark42.
- Giscus. A clean-looking comment UI that uses Github discussions to store the comments. This comment system requires users to log in with Github. I didn't choose this for my travel blog because my readers are not likely to be Github users.
- Disqus. This appears to be a well-supported comment system that is very popular. It has many login-types. I chose not to use this because of the ads and selling of user data.
Overview of this tutorial
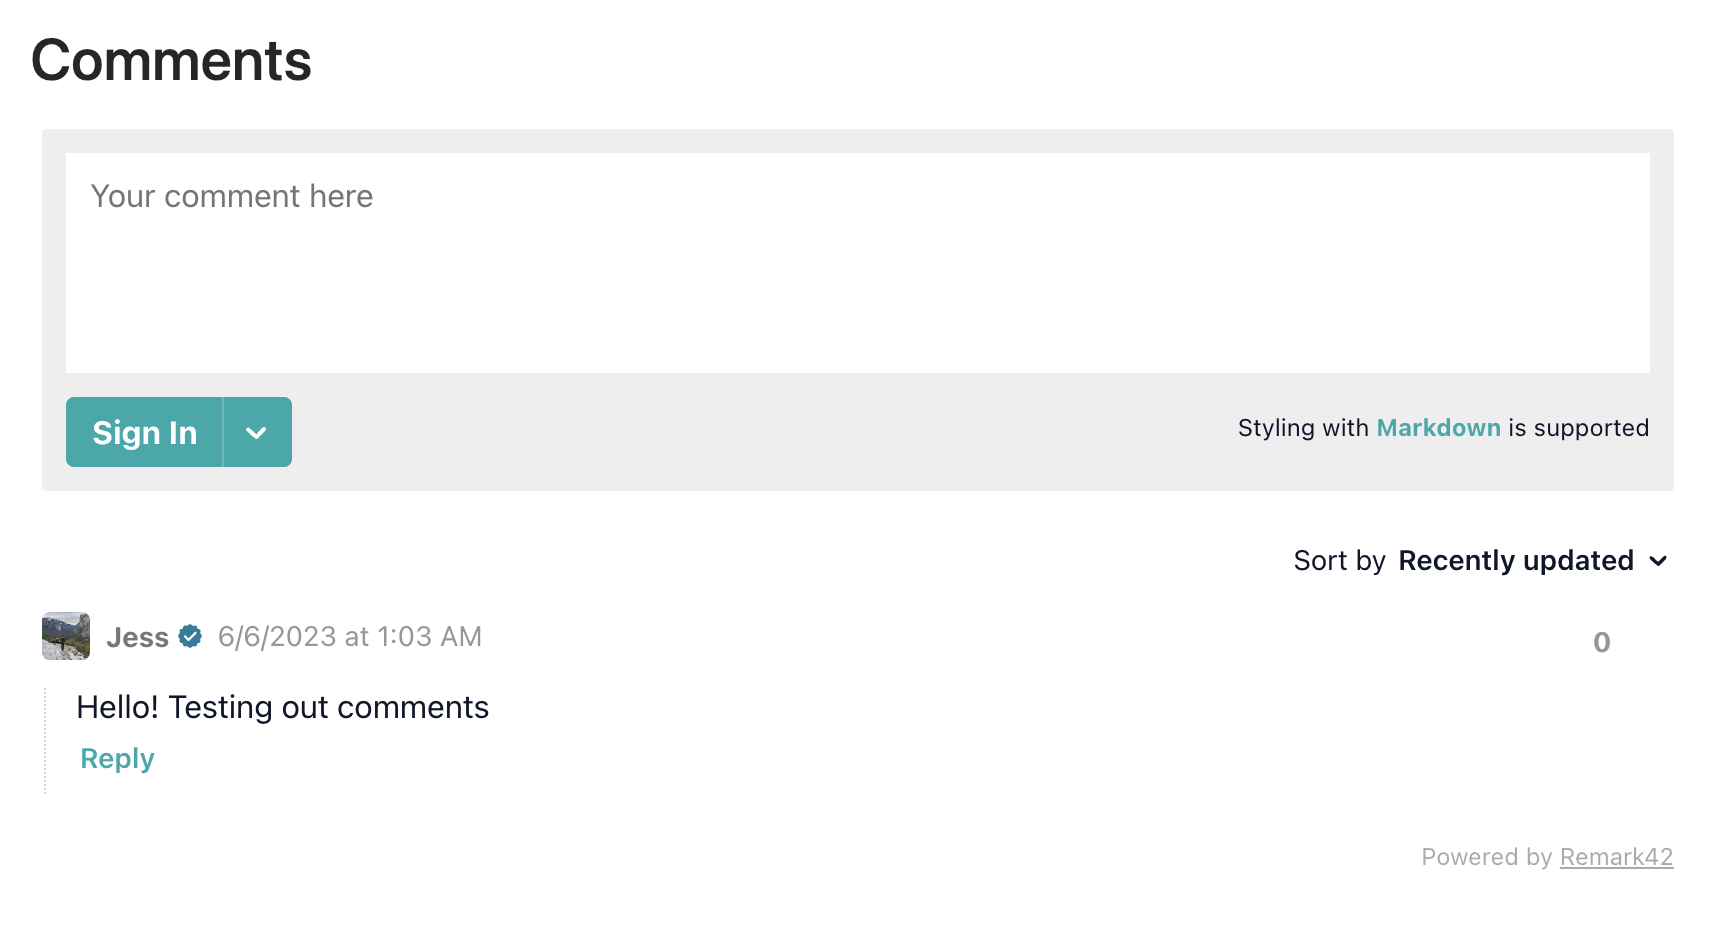
After following the steps below, you will have added comment support to your website. Users can make anonymous comments or log in with Google to make comments. This is what the result looks like:
Prerequisite: This guide assumes that you have an existing live website and that you can modify the source code for this website.
Disclaimer: This tutorial is based on the steps that I used to set up Remark42 with my website, which may not work for your setup. I am developing on MacOS Ventura, and my website that I am adding comments to is built with NextJS and deployed through Vercel. The VM that I signed up for in this guide is running Oracle Linux 8.
Tutorial steps
- Part 1: Get a compute instance
- Part 2: SSH to your compute instance
- Part 3: Create a subdomain that points to your compute instance
- Part 4: Install Docker
- Part 5: Start the Remark42 comment engine
- Part 6: Install NGINX
- Part 7: Install SSL certificate
- Part 8: Set up the NGINX reverse-proxy server
- Part 9: Add the comment widget on your website
- Part 10: Enable social media login
- Part 11: Make yourself an admin
Part 1: Get a compute instance
First you'll need to get a virtual machine for hosting. There are many options for this. This guide shows you how to sign up for a free compute instance on Oracle Cloud.
- Visit https://oracle.com/cloud/free. Click "Start for free" or sign in with an existing account.
- Fill out the required account information to create your account. I had to install an Oracle Authenticator mobile app for two-factor authentication. I also had to provide credit card information, though the account that I signed up for was free.
- Within your account, open the page to create a compute instance. I kept most of the settings at their default but made a couple modifications.
- The default shape was set to Ampere VM.Standard.A1.Flex, 1 core OCPU, 6 GB memory. I increased to 4 core OCPU and 24 GB memory; these are the max specifications that are still allowed in the "Always free" tier.
- Click the button to download the private key so that you can SSH to your machine later. Mine was saved as a file named ssh-key-2023-06-16.key.
- Click "Create". The first time that I tried clicking "Create", I got an error saying that the instance could not be created in the selected Availability Domain. I scrolled up and selected one of the other Availability Domains, then clicked "Create" again, and the action was completed without error.
- It will take a few minutes for the instance to be created. The instance is done being created when the "Create instance" operation under "Work requests" has the state "Succeeded". Continue with the next step after the instance has been created.
References:
- My original inspiration for using Oracle Cloud compute instance: https://terrty.net/2022/self-hosted-comments-remark42/
Part 2: SSH to your compute instance
- Before SSH-ing, collect the following information.
- the private key file that you downloaded in the prior section
- the instance's public IP address (Located under "Instance information")
- your username on the instance (Defaults to "opc")
- Make the private key file readonly. Otherwise you may get an error when you attempt to SSH.
# Replace <private_key_filename> with the actual filename. chmod 400 <private_key_filename> - SSH to the compute instance.
# Example `ssh -i ssh-key-2023-06-16.key opc@129.146.161.66` ssh -i <private_key_filename> <username>@<instance_public_IP>` - Because this is your first time SSH-ing to this machine, you will see a message like "The authenticity of host '129.146.161.66 (129.146.161.66)' can't be established... Are you sure you want to continue connecting (yes/no/[fingerprint])?" Type "yes" and enter.
- Verify that you have successfully SSH-ed to the instance. The terminal prompt should something like the following.
[opc@instance-20230616-1632 ~]$
Part 3: Create a subdomain that points to your compute instance
- Find the public IP address of your compute instance. This is located under "Instance information" for your instance on the Oracle Cloud website. For example, mine is "129.146.161.66".
- Go to the domain name management settings for the website that you want to add comments to. This will be located at your specific domain name registrar that you used to register your original domain name (for example, NameCheap, Domain.com, DreamHost, GoDaddy, etc)
- Decide on a new subdomain of your website that will point to the comment engine. Add a new record that maps the subdomain to the compute instance's public IP address. For example, I decided to call my subdomain "comments.jessgoesoutside.com". In my settings for jessgoesoutside.com, I created a subdomain record for "comments" and mapped it to my public IP address "129.146.161.66".
If you are having trouble adding a subdomain, try looking up help documentation for your specific domain name registrar for more detailed instructions.
Part 4: Install Docker
Using Docker is the recommended way to run Remark42 according to the official documentation.
-
Install Docker on the compute instance. The following commands worked for my compute instance which was running Oracle Linux 8.
# Install Docker sudo yum install -y yum-utils sudo yum-config-manager --add-repo https://download.docker.com/linux/centos/docker-ce.repo sudo yum install docker-ce docker-ce-cli containerd.io docker-buildx-plugin docker-compose-plugin # Run Docker sudo systemctl start docker -
Allow yourself to run Docker commands as a non-root user.
sudo groupadd docker sudo usermod -aG docker opc -
Log out and log back in to the compute instance so that the permissions from the previous step are active. (ctrl+d to log out, then SSH back into the instance)
References:
- Installing Docker on CentOS: https://docs.docker.com/engine/install/centos/.
- Manage Docker as a non-root user: https://docs.docker.com/engine/install/linux-postinstall/#manage-docker-as-a-non-root-user
Part 5: Start the Remark42 comment engine
-
As described in the official Remark42 install documentation, you need to add a docker-compose.yml file to run Remark42 with Docker. Create a file named "docker-compose.yml" on your instance and paste the contents of the example "docker-compose.yml" into it, then modify to your needs. My file looks like this:
version: "2" services: remark: image: umputun/remark42:latest container_name: "remark42" hostname: "remark42" restart: always logging: driver: json-file options: max-size: "10m" max-file: "5" ports: - "8080:8080" environment: # Put your own URL that you want to use to host the comment engine - REMARK_URL=https://comments.jessgoesoutside.com - SITE=jgo-comments # Add your own secret string here. Per the docs, this should be a random, long, hard-to-guess string - SECRET= - AUTH_ANON=true - DEBUG=true - SIMPLE_VIEW=true volumes: - ./var:/srv/var -
Use Docker to run the Remark42 comment engine.
docker compose up -d -
Verify that the service is running using
curl -v http://127.0.0.1:8080and verify that you can connect. You'll see a line in the output like "Connected to 127.0.0.1 (127.0.0.1) port 8080 (#0)". Since this isn't a valid webpage within the Remark42 app, the response will be a "404 page not found".
References:
Part 6: Install NGINX
The steps completed so far will let you run the comment enginer server with the HTTP protocol. We'll install NGINX in order to run a lightweight reverse-proxy server that allow the server to support HTTPS. HTTPS support is important for several reasons, but one in particular is that modern web browsers will often flag a non-HTTPS website as unsafe.
- Install NGINX and its dependencies.
sudo dnf install -y nginx - Start the NGINX service.
sudo systemctl enable --now nginx.service - Check the status.
sudo systemctl status nginx - Open the firewall port for the nginx web service (port 80)
sudo firewall-cmd --add-service=http --permanent sudo firewall-cmd --reload - Verify that your NGINX server is accessible. Visit http://<public_IP_address> (for example http://129.146.161.66/) in your web browser. Verify that you can see the NGINX server test page showing the message "Welcome to nginx on Oracle Linux!".
- Verify that the subdomain registered in Part 3 is integrated correctly. Visit your subdomain in your browser using HTTP (For example http://comments.jessgoesoutside.com). Verify that it shows the same NGINX server test page.
References:
Part 7: Install SSL certificate
The following steps install an SSL certificate on an instance specifically running Oracle Linux 8.
- Enable the EPEL repository for your Oracle Linux version. I looked up the instance details for my instance and found that it was using the image Oracle-Linux-8.7-aarch64-2023.05.24-0 (Oracle Linux 8).
cd /tmp wget https://dl.fedoraproject.org/pub/epel/epel-release-latest-8.noarch.rpm sudo rpm -Uvh /tmp/epel-release-latest-8.noarch.rpm cd - Install snap.
sudo dnf install -y snapd sudo systemctl enable --now snapd.socket sudo systemctl start snapd sudo ln -s /var/lib/snapd/snap /snap - Install and refresh core.
sudo snap install core sudo snap refresh core - Install certbot.
sudo snap install --classic certbot sudo ln -s /snap/bin/certbot /usr/bin/certbot - Run the following command to get a certificate and have Certbot edit your NGINX configuration automatically to serve it, turning on HTTPS access in a single step. You'll need to provide the domain name you are registering the certificate for, which is the subdomain specified in Part 3. For my site this is "comments.jessgoesoutside.com".
sudo certbot --nginx - Open firewall port for https (443).
sudo firewall-cmd --add-service=https --permanent sudo firewall-cmd --reload - Visit your subdomain in your browser with HTTPS (for example https://comments.jessgoesoutside.com). Verify that you can see the NGINX server test page.
References:
- https://oracle-base.com/articles/linux/letsencrypt-free-certificates-on-oracle-linux
- https://certbot.eff.org/instructions?ws=nginx&os=centosrhel8
Part 8: Set up the proxy
In the prior part, Certbot updated the NGINX config file to configure a server listening on port 443 (https) and using the generated certificate. The NGINX config file also redirects the traffic from port 80 to port 443.
-
We'll need to modify the NGINX config so that the server listening on port 443 points to the Remark42 instance which is running at 127.0.0.1:8080 as configured in Part 5. To do this, copy the relevants part of the Remark42 suggested NGINX config, and move them into your NGINX config located at /etc/nginx/nginx.conf. Modify the names as necessary. After completing this, the part of my NGINX config file that configures the listeners for port 80 and port 443 looks like this:
server { server_name comments.jessgoesoutside.com; # managed by Certbot root /usr/share/nginx/html; # Load configuration files for the default server block. include /etc/nginx/default.d/*.conf; error_page 404 /404.html; location = /40x.html { } error_page 500 502 503 504 /50x.html; location = /50x.html { } listen [::]:443 ssl ipv6only=on; # managed by Certbot listen 443 ssl; # managed by Certbot ssl_certificate /etc/letsencrypt/live/comments.jessgoesoutside.com/fullchain.pem; # managed by Certbot ssl_certificate_key /etc/letsencrypt/live/comments.jessgoesoutside.com/privkey.pem; # managed by Certbot include /etc/letsencrypt/options-ssl-nginx.conf; # managed by Certbot ssl_dhparam /etc/letsencrypt/ssl-dhparams.pem; # managed by Certbot gzip on; gzip_types text/plain application/json text/css application/javascript application/x-javascript text/javascript text/xml application/xml application/rss+xml application/atom+xml application/rdf+xml; gzip_min_length 1000; gzip_proxied any; location ~ /\.git { deny all; } location /index.html { proxy_redirect off; proxy_set_header X-Real-IP $remote_addr; proxy_set_header X-Forwarded-For $proxy_add_x_forwarded_for; proxy_set_header Host $http_host; proxy_pass http://127.0.0.1:8080/web/index.html; } location / { proxy_redirect off; proxy_set_header X-Real-IP $remote_addr; proxy_set_header X-Forwarded-For $proxy_add_x_forwarded_for; proxy_set_header Host $http_host; proxy_pass http://127.0.0.1:8080/; } access_log /var/log/nginx/comments.log; } server { if ($host = comments.jessgoesoutside.com) { return 301 https://$host$request_uri; } # managed by Certbot listen 80 ; listen [::]:80 ; server_name comments.jessgoesoutside.com; return 404; # managed by Certbot } -
Restart NGINX so that the modified config takes effect.
sudo systemctl restart nginx -
Run the following command to allow the reverse proxy to relay requests.
sudo setsebool -P httpd_can_network_relay 1 -
Visit your comments subdomain in your browser (For example, I visit https://comments.jessgoesoutside.com). Verify that you are no longer seeing the NGINX test page. You should see a "404 page not found" because this is what the comment engine uses as the home page. Add "/web" to the url (Example: https://comments.jessgoesoutside.com/web) and verify that you see the Remark42 comment demo page.
References:
- https://remark42.com/docs/manuals/nginx
- https://stackoverflow.com/questions/23948527/13-permission-denied-while-connecting-to-upstreamnginx
Part 9: Add the comment widget on your website
- Build a comment widget that connects to your comment engine server. My website is built with NextJS and React, and I was able to use the Remark42 Gatsby React example to create a React comment component with minimal modifications. Naming the component "Comments", I inserted the component into my post page like so:
<Comments location="{props.slug}"></Comments> - Run the code locally and ensure that you can see the comment widget. You may not be able to submit comments because the development domain is different from the production domain.
- Deploy the code, and verify that the comment widget works on your website.
Congrats! At this point you should have a working comment widget on your website that allows anonymous comments.
References:
- https://remark42.com/docs/manuals/integration-with-gatsby/
- https://remark42.com/docs/configuration/frontend/
Part 10: Enable social media login
I've added login support with Google because Google accounts are widely used.
- Use the Remark42 instructions for integrating Google OAuth: https://remark42.com/docs/configuration/authorization#google. The instructions should give you value for AUTH_GOOGLE_CID and AUTH_GOOGLE_CSEC. Add these values to your docker-compose.yml file.
- Optionally, you can remove AUTH_ANON=true from docker-compose.yml to prevent anonymous comments now that you have another way for users to identify themselves.
- Restart your container for the new changes to take effect.
docker compose down docker compose up -d - View the comment widget on your website. Click "Sign in" and verify that you can sign in with a Google account.
Part 11: Make yourself an admin
- Go to your demo comment site located at <subdomain>/web. (Example https://comments.jessgoesoutside.com/web). Sign in with your social media account (with this tutorial, we have only integrated with Google so it will be a Google account).
- Once signed in, your name will appear above the comment box. Click on the name and a panel will appear listing your name with your id underneath. The id will look something like "google_d3441d7745fb76a3a1256c0e2...".
- Edit your docker-compose.yml file to add ADMIN_SHARED_ID=<id> using the id determined in the prior step (Example: ADMIN_SHARED_ID=google_d3441d7745fb76a3a1256c0e212345).
- Restart your container for the new changes to take effect.
docker compose down docker compose up -d - Verify that you have admin privileges. Sign in to the comment system with your same account. You should see additional settings and the option to disable comments.
Congratulations! At this point, you should have a working comment widget on your website that allows social media login and allows you to administrate the comments.